Genuine Amber Identification Tests: A Practical Guide

Genuine amber identification tests are a set of accessible procedures that confirm amber authenticity by assessing physical properties and chemical behavior. Baltic succinite, the scientific name for Baltic amber, has a distinct chemical fingerprint that no plastic, copal, or synthetic resin can replicate. Collectors, parents buying amber jewelry for children, and natural goods enthusiasts all face the same challenge: the market carries convincing fakes. The good news is that combining two or more home tests gives you a reliable picture before you spend money or trust a product near a child or pet.
1. What are the key non-destructive home tests for genuine amber?
No single home test is individually decisive. Combining at least two tests gives you a much stronger indication of authenticity than any one method alone. Start with the easiest tests and work toward the more involved ones.
The saltwater float test
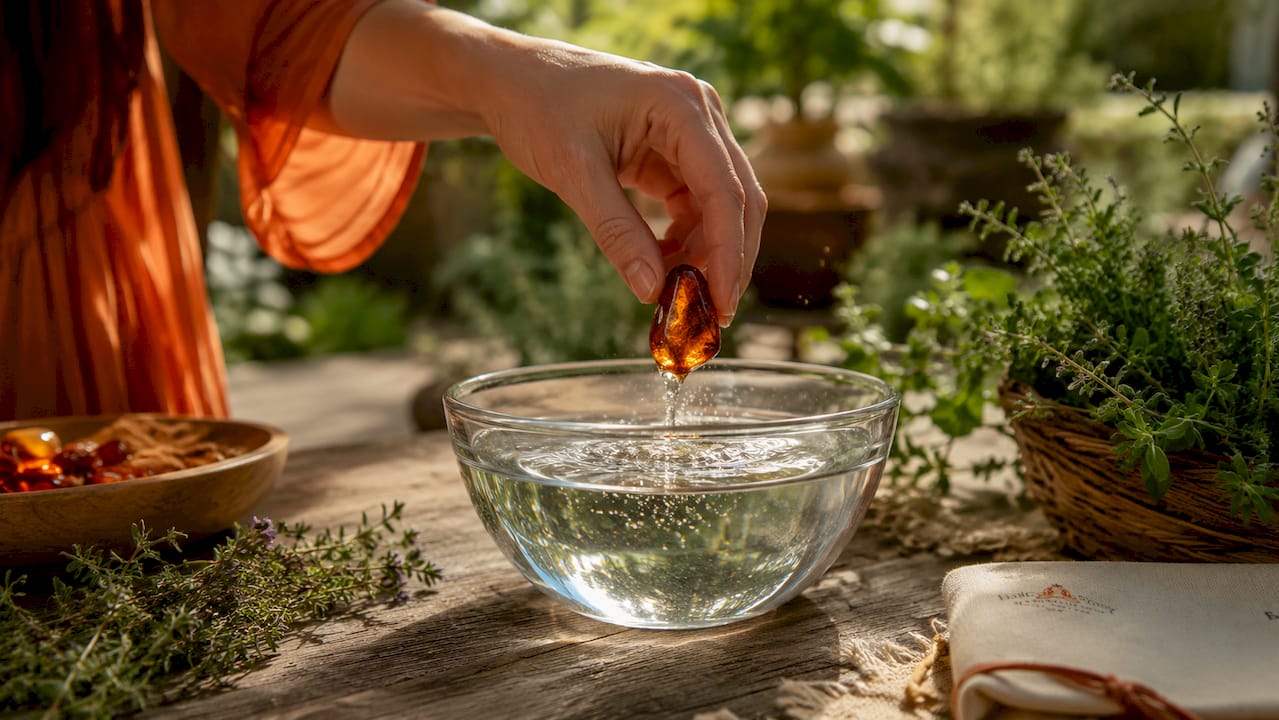
Dissolve one part salt in four parts water. Drop the amber piece in. Real amber floats; most plastics and glass fakes sink. This works because genuine Baltic amber has a density close to that of saturated saltwater. One critical caution: saltwater can damage finished jewelry by depositing salt crystals on metal settings and organic surfaces. Rinse the piece thoroughly and dry it completely after the test.
The UV fluorescence test
Hold a 365nm UV lamp over the piece in a dark room. Genuine Baltic amber glows blue, green, or yellow under UV light. Plastic fakes either do not fluoresce or produce a very different color. This test is quick, clean, and leaves no marks on the surface.
The static electricity test
Rub the amber briskly against a wool cloth for about 30 seconds. Then hold it near small torn pieces of paper. Real amber attracts the paper due to its genuine electrostatic properties. The word “amber” traces back to the Greek word elektron because of this exact property. Plastic can also generate static, so use this test alongside others rather than alone.
The acetone test
Apply a small amount of acetone or ethanol to a hidden spot on the surface. Copal becomes sticky and cloudy within 1–2 minutes. Genuine amber is unaffected. This test effectively separates young tree resin (copal) from true fossilized amber, but it may dull a polished surface, so apply it to an inconspicuous area.
Visual inspection
Examine the piece under good light. Genuine amber shows natural flow lines, tiny air bubbles, or organic inclusions. Perfectly uniform clarity or suspiciously symmetrical inclusions point to synthetic material. A loupe or macro lens on your phone makes this much easier.
Pro Tip: Run the saltwater float test and the UV fluorescence test together first. They are the fastest, safest pairing and will rule out the most common fakes before you try anything more involved.
2. Which destructive tests confirm authenticity, and when should you use them?
Destructive tests cause permanent damage. Use them only on low-value pieces or raw fragments where you can afford to lose the surface. Experts strongly warn against using these methods on valuable or finished jewelry.
The hot needle test
Heat a metal needle until it glows, then press it briefly against a hidden spot on the piece. Genuine amber emits a pine-resin scent. Plastic produces an acrid, chemical smell. Copal smells sweet but slightly different from true amber. The test leaves a small burn mark and should be treated as a last resort.
The burn test
Hold a small fragment with tweezers and apply a flame. Genuine amber burns with a white smoke that smells of pine resin. Plastics melt, drip, and smell of chemicals. Copal burns but melts more readily than amber and produces a different smoke character.
When to use destructive tests
- You have a raw, unpolished fragment with no collector or monetary value.
- All non-destructive tests have given inconclusive results.
- You are testing a piece before purchase and the seller permits it.
- The piece is not near children or pets during testing.
Pro Tip: Always perform destructive tests outdoors or in a well-ventilated area. The fumes from burning plastic are toxic. Keep a glass of water nearby in case the piece catches a sustained flame.
3. How does FTIR spectroscopy verify amber authenticity?
FTIR spectroscopy is the gold standard for definitive amber identification. It detects the “Baltic shoulder,” a specific absorption band between 1175–1250 cm⁻¹ that is unique to Baltic succinite. No other resin or synthetic material produces this exact chemical signature.
The test works by shining infrared light through the sample and measuring how the material absorbs different wavelengths. The resulting spectrum acts as a chemical fingerprint. FTIR is the only conclusive test recognized by gem labs and institutional collectors for distinguishing Baltic succinite from other resins or synthetics.
| Feature | Home tests | FTIR spectroscopy |
|---|---|---|
| Destructive? | Some (hot needle, burn) | No |
| Cost | Minimal | 80–250 euros per piece |
| Time required | Minutes | Minutes (at the lab) |
| Conclusive? | No single test is | Yes |
| Recognized by gem labs? | No | Yes |
| Best for | Preliminary screening | Final verification |
FTIR testing is typically done at university geology departments, certified gemological labs, or specialist amber research centers. The cost per piece ranges from 80 to 250 euros depending on the lab and location. That cost is worth it for high-value collector pieces, antique jewelry, or any amber product intended for long-term use near children.
The one limitation is access. Not every city has a lab that offers amber FTIR testing. For most collectors and parents, home tests serve as the first filter, with FTIR reserved for pieces where the stakes are high enough to justify the expense.
4. How to interpret inclusions and features to distinguish genuine amber from fakes
Inclusions are one of the most telling signs of authenticity. Genuine Baltic amber traps organic material during fossilization, creating three-dimensional embeddings with natural geological distortion around them. Fakes with insect inclusions often show glued cut-planes or seams where two pieces of resin were pressed together around a modern insect.
What genuine inclusions look like
Natural inclusions in real amber sit fully inside the material with no visible seam or joint. Air bubbles appear irregular and randomly distributed. Organic debris such as plant fragments, bark, or soil particles shows natural compression and distortion from millions of years of pressure. The inclusion looks like it belongs inside the stone because it does.
Signs of fake inclusions
- A visible seam or flat plane running through or near the inclusion.
- An insect that appears perfectly positioned, as if placed deliberately.
- Inclusions that look identical in multiple pieces from the same seller.
- Air bubbles that are perfectly round and evenly spaced.
- The inclusion appears to float in a layer rather than being embedded three-dimensionally.
How to examine inclusions properly
Use a 10x loupe or the macro setting on a smartphone camera. Photograph the piece from multiple angles and zoom in on the inclusion zone. Natural inclusions look different from every angle. A glued seam, by contrast, appears as a flat line that stays consistent regardless of viewing angle.
Pro Tip: Apply the material-first principle before trusting any provenance claim or hallmark. False hallmarks are irrelevant when material tests fail. Verify the amber itself first, then consider the documentation.
The connection between visual inspection and test results matters here. If the saltwater and UV tests suggest genuine amber but the inclusion looks glued, treat the piece as suspect. No single indicator overrides the others. A well-rounded assessment uses all available evidence together, because no single home test is individually decisive.
Key takeaways
Genuine amber identification requires combining multiple non-destructive tests, with FTIR spectroscopy as the only lab-recognized method for conclusive verification.
| Point | Details |
|---|---|
| Combine home tests | No single home test is conclusive; use saltwater, UV, and static tests together. |
| Acetone screens copal | Copal turns sticky within 1–2 minutes; genuine amber shows no reaction. |
| Destructive tests are last resort | Use hot needle or burn tests only on low-value fragments, never on finished jewelry. |
| FTIR is the gold standard | The Baltic shoulder absorption band at 1175–1250 cm⁻¹ is unique to Baltic succinite. |
| Inclusions reveal fakes | Glued seams and perfectly positioned insects signal forgery; genuine inclusions are three-dimensional. |
What I’ve learned from years of working with Baltic amber
The most common mistake collectors and parents make is trusting one test too much. I have seen pieces pass the saltwater float test and fail the UV test. I have seen copal fool the visual inspection but dissolve immediately in acetone. The only approach that holds up is cumulative: run at least two non-destructive tests, examine the inclusions carefully, and treat any inconsistency as a reason to dig deeper.
For parents buying amber jewelry for children or pets, the stakes are higher than for collectors. A children’s amber necklace worn daily needs to be genuine Baltic succinite, not copal or plastic. Copal is softer and degrades faster. Plastic offers none of the natural properties that make Baltic amber worth wearing. The difference matters.
My honest recommendation: start with the UV fluorescence test and the saltwater float test. They are fast, safe, and together they eliminate the vast majority of fakes. If you are spending serious money or the piece is going near a child, send it for FTIR testing. The cost is modest compared to the confidence it gives you. Provenance documents and seller claims are secondary. The material either passes the tests or it does not.
— Baltic Secret
Authentic Baltic amber products from Baltic Secret
Baltic Secret sources all amber directly from Lithuania, where Baltic succinite has been harvested and crafted for centuries. Every piece goes through authenticity verification before it reaches you.
Whether you are looking for amber beads for children, pets, or adults, Baltic Secret offers handcrafted jewelry built for daily wear. Parents will find necklaces and bracelets designed with child safety features. Pet owners can choose from amber collars sized for dogs and cats. Jewelry collectors will find artisanal pieces made from raw and polished Baltic amber. Each product comes with clear material information so you know exactly what you are buying. When authenticity matters, sourcing from a verified supplier is the most reliable step you can take.
FAQ
What is the most reliable home test for real amber?
The saltwater float test combined with UV fluorescence gives the strongest home-based indication. Neither test alone is conclusive, but together they eliminate most common fakes.
Can copal pass as genuine amber?
Copal passes the saltwater and static tests but fails the acetone test. It becomes sticky and cloudy within 1–2 minutes of acetone contact, while genuine amber shows no reaction.
Is FTIR testing worth the cost?
For high-value pieces or amber worn by children, yes. FTIR detects the Baltic shoulder absorption band unique to Baltic succinite and is the only test recognized by gem labs as conclusive.
Does genuine amber always have inclusions?
No. Many genuine amber pieces are clear with no visible inclusions. Inclusions add value and interest, but their absence does not indicate a fake. Their presence, however, can confirm or deny authenticity based on how they appear.
How do I test amber without damaging it?
Use the saltwater float test, UV fluorescence test, and static electricity test in sequence. All three are non-destructive. Rinse and dry the piece thoroughly after the saltwater test to prevent salt crystal deposits on metal settings.